Creating an app
Summing up
Before we continue, let's sum up what we should have up until this point:
- a Saleor account assigned to an organization
- a Saleor Dashboard for a project we want to extend with an app
- Saleor CLI installed
If at any point you feel you've got lost, feel free to peek into the corresponding repository 🖥️.
All good? Let's start building then 🚀!
Step 1. Spawning the App Template
Saleor CLI provides developers with a modern app template, built with Next.js and TypeScript. It includes the boilerplate and all dependencies needed for further development of a Saleor app.
To spawn it, go to your terminal, cd to the path where you want to install the template and type in:
saleor app template abandoned-checkouts
Under the hood, the saleor app template command uses the Saleor App Template repository. If you want to read up on it, go here.
This command will install a Next.js app called abandoned-checkouts equipped with many tools that'll come in handy during the process of integration.
After the successful installation, you have to cd into the abandoned-checkouts directory, and boot up the project using pnpm. The command is:
pnpm dev
Step 2. Updating the App Manifest
The App Manifest serves as a source of information about the Saleor app. It includes the app name, description, URL, as well as configuration for webhooks and extensions. The data is then consumed by other Saleor parties such as the API and the Dashboard.
Don't worry, you don't need to fill the manifest yourself. If you use the CLI, a basic manifest is generated.
Some apps don't require a UI. They can communicate through webhooks without displaying an interface.
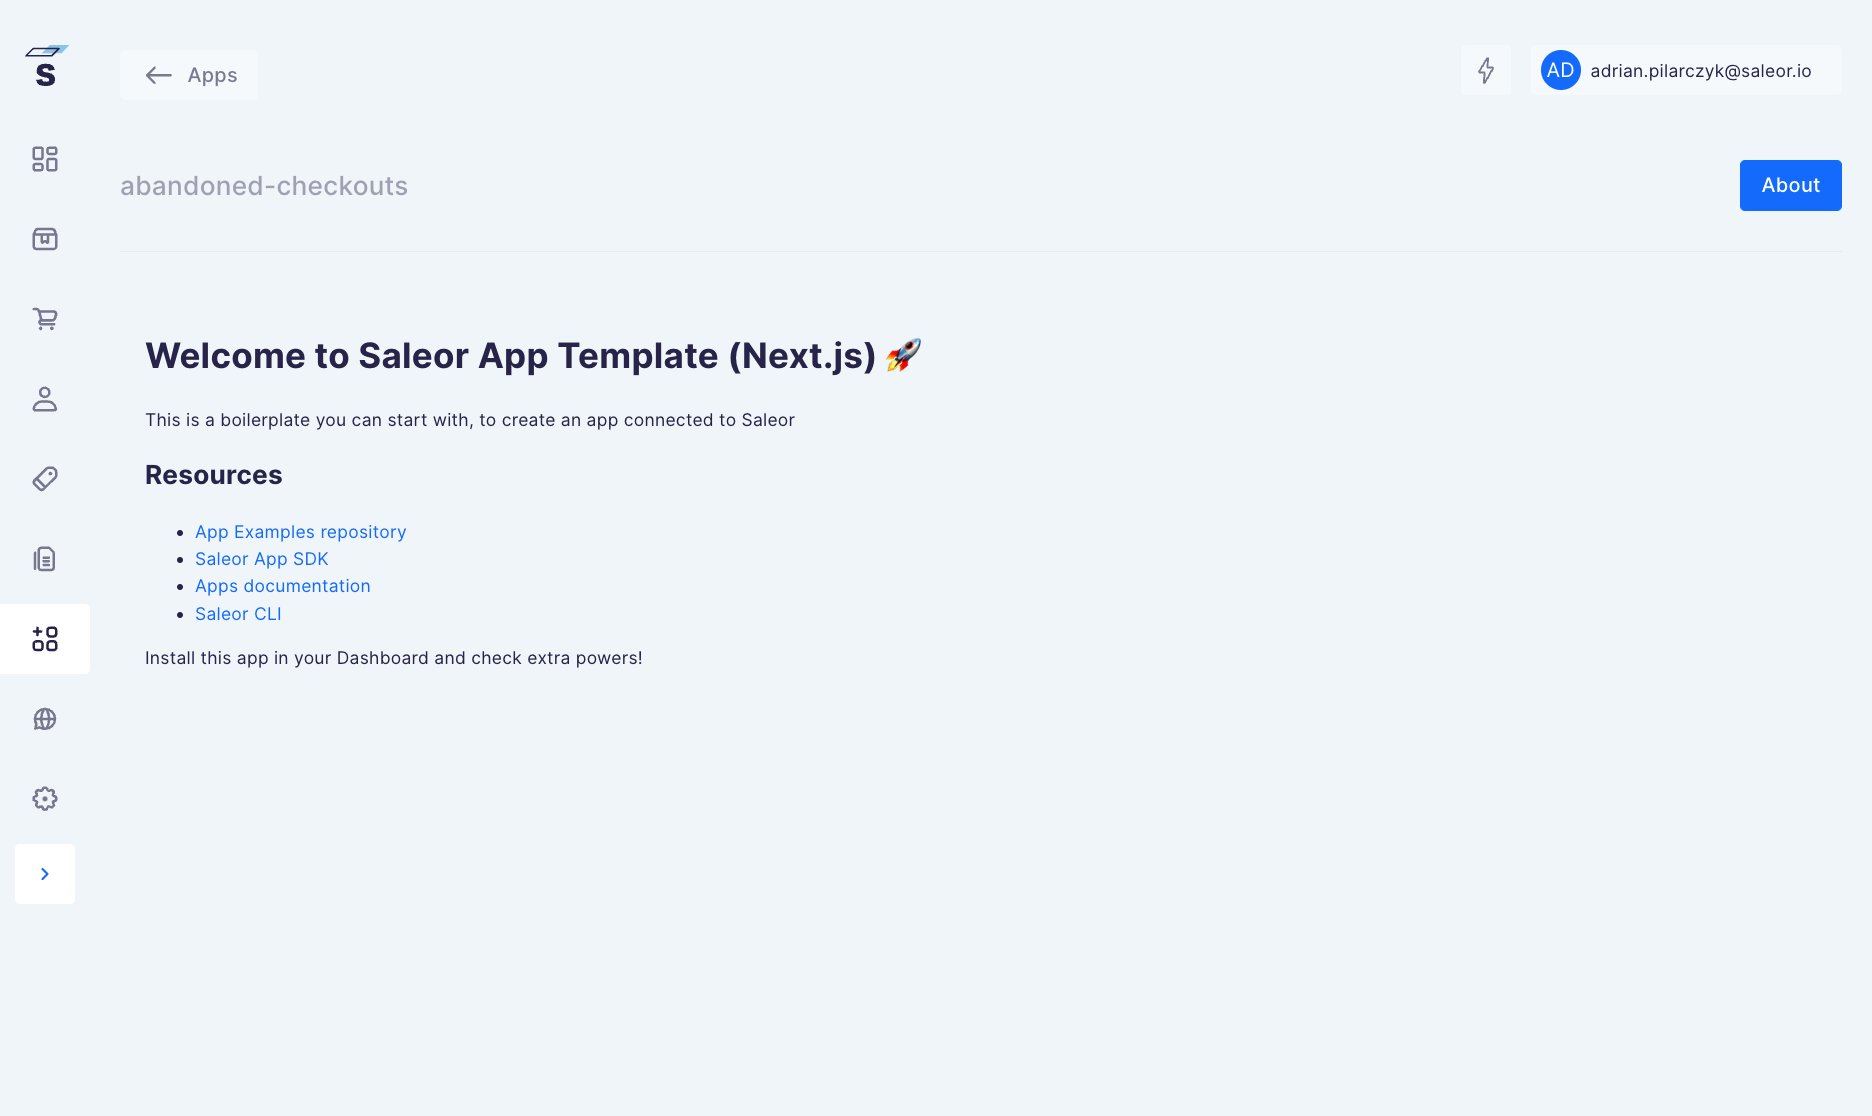
However, the purpose of our application is to render a list of abandoned checkouts. This gives us a perfect chance to leverage one of many cool baked-in features in the app template the CLI has spawned for us: mounting an app in the Saleor Dashboard.
Even though apps are separate codebases, they can be embedded inside the Saleor Dashboard. To accomplish it, please:
- Open your code editor, go to the
pages/api/manifest.tsfile in your app and locate themanifestobject. - As our app will operate on checkouts, we must grant it the permissions required to fetch them. Find the
permissionsfield and addMANAGE_CHECKOUTSto it:
...
permissions: ["MANAGE_CHECKOUTS"],
...
The permissions field determines the scope of operations the app is authorized to perform. You can find the full list of permissions here.
- Next, we want to declare the place in our Dashboard where the app should mount. To do so, please find the
extensionsfield. Then, add a new extension to it as follows:
...
extensions: [
	{
		label: "Show Abandoned Checkouts",
		mount: "NAVIGATION_ORDERS",
		target: "APP_PAGE",
		permissions: ["MANAGE_CHECKOUTS"],
		url: "/",
	},
],
...
Let's break down what we have here:
- The
extensionscomes from the "extendability" of the Dashboard. - There can be many "extensions" for each app. That is why the value of
extensionsis an array. - The array contains an object with five fields:
label: A name of our extension. It will display in the Dashboard menu.mount: An identifier of the place where we can mount our apps.target: It describes the method of presenting the interface. The other option isPOPUP.permissions: It allows blocking access from the extension based on user permissions. If the users don't have the right permissions, they won't be able to display the extension.url: The path in the application the extension should render. As we will build our UI in thepages/index.tsxfile, the path is "/".
Step 3. Installing the app in the Dashboard
In the next couple of paragraphs, you will see the term "tunneling" being thrown quite frequently. If it all sounds a bit foreign, please head on over here.
Option 1: Using saleor app tunnel
At this moment, you are developing your app locally. To embed it in your Dashboard hosted on Saleor Cloud, you need to make your environment public. Luckily, the CLI has your back on this one.
While running the app in the background, please execute:
saleor app tunnel 3000
The CLI wizard will ask you about the organization and environment. Those details are needed to install your app in the correct Saleor instance.
3000 is the assumed port on which your application is running. If you decided to run it on a different port, please adjust the command.
The result of running this command is twofold:
- It exposes your local environment through tunneling software. That makes it available publicly.
- It installs your app in the Dashboard which makes it display under the location we pointed out in the previous point.
Option 2: Using a third-party tunneling software and saleor app install
Alternatively, you can make your app live using a third-party tool. To set the tunnel manually, you can use localtunnel or ngrok. Follow the installation guides linked.
Then, go to your terminal and:
- While in the app's root folder, type in
saleor app install. - Provide the
namefor the app:abandoned-checkouts. - Provide the
urlto the app's manifest, following the format: [yourdomain-set-with-tunneling-app]/api/manifest.
Either way, you can now go to your Saleor Dashboard and inspect your app in the Apps tab, as well as the Orders tab.